

This page is to be used as archived information for the original Overkill supercharger systems, please visit Tracy Lewis Performance to purchase a new supercharger system.
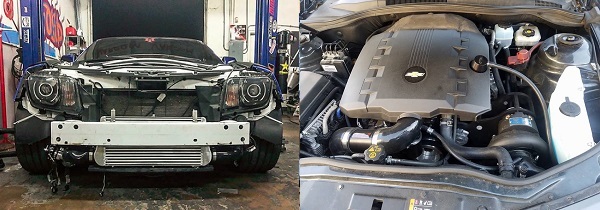
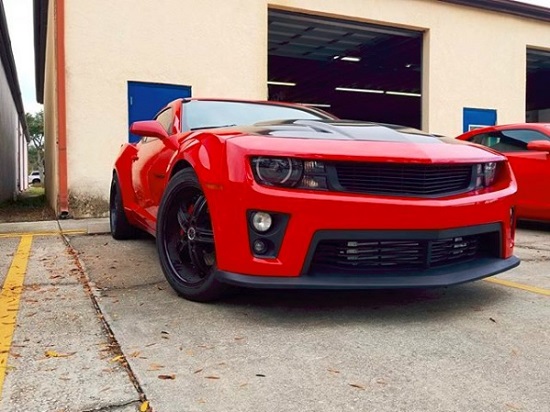
Welcome to the Overkill supercharger system for your 2010 to 2015 Camaro 3.6 V6. There's a lot of information packaged into this page so keep scrolling down for more information.
The Overkill supercharger system featuring Procharger superchargers answers the question on how you make V8-like horsepower with your 3.6 V6. Whether you've owned your 5th gen Camaro V6 for a long time or a new owner, you had specific reasons for getting the V6 and now you're ready for more! The age-old concept of pressurizing intake flow with a supercharger works great with these new-age Direct Injection V6s and Overkill is proud to be the only source for a bolt on forced induction system for your 5th gen Camaro V6.
This system is a bolt on installation with no permanent modifications to your vehicle and 100% reversible. You are not required to have any other modifications on your vehicle for the Stage 1 kit and all Stages are designed to work with a factory 3.6 engine. Every item to install the supercharger on your Camaro V6 is included in this kit, including going above the normal expectation with the catch can system and tuning service, wiring adapters, fabricated brackets etc. What Overkill doesn't fabricate, top quality components are sourced such as the Procharger brand head units used in all systems.
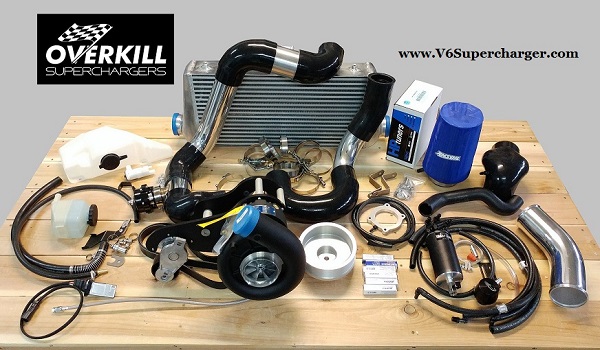
All kits include the following components and features:
- Procharger Supercharger unit - P1SC model for Stages 1 and 2, D1SC for Stage 3, self contained oiling system (no oil lines connect to the engine), D-Series supports up to 16psi on the 3.6
- Overkill 8-rib pulley system - unique mounting brackets use existing engine point attachments to mount the Procharger, a new independent crank pulley interlocks with the factory pulley and runs a dedicated 8-rib belt for the supercharger that doesn't interfere with the factory accessory belt
- Full Intercooler system - Large air-air intercooler, atmosphere-vent blow off valve, custom machined MAF housing and full silicone/aluminum tubing with Tbolt clamps, top quality components.
- Overkill tuning with HP Tuners - each kit optionally comes with an HP Tuner suite and tuning to support for yourself or the installation/tuning shop of your choice. Please see the purchase agreement for more info on the tuning process.
- Catch can system - helps separates oil vapors in the PCV system, helps keep oil residue out of the supercharger system and intercooler, closed loop system with no open air venting under boost
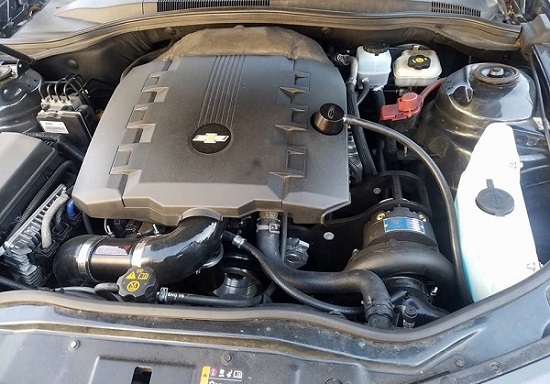
- Many accessories such as full Intake system with K&N air filter, new AC Delco spark plugs designed for boost, new MAP sensor that reads boost (for 2012-15 engines), a full complement of parts required for installation such as MAF wiring extension harness, power steering oil relocation kit, washer fluid bottle relocation kit, throttle body spacer to provide engine vacuum source, prefabricated vacuum lines for the catch can including OEM connection fittings at the engine, oil for several oil changes for the Procharger.
New for September 2020 - Switch to Procharger!
Overkill is excited to announce the switch to Procharger head units for this supercharger system. Stage 1 and 2 come with a P series Procharger while Stage 3 comes with a D series that you can anticipate high horsepower potential from when pushing beyond our Stage kits with additional modifications. Read below to understand the difference in Stage kits and what might be right for you!


**Updated February 2021**
Stage 1 - 8 psi - 350-370 wheel horsepower anticipated (factory 245-260 wheel/chassis dyno horsepower). The base Stage 1 kit is extremely popular, it'll bump up performance on a completely factory engine and requires no fuel system upgrades. Upgrades to the exhaust system are recommended but not required, 91 octane or higher pump gasoline is required. Stage 1 uses a P1SC Procharger that's designed to build mid-range boost fast to improve torque and also provide high rpm horsepower gains.
Stage 1.5 - 9-10 psi - 370-400 wheel horsepower anticipated. Stage 1.5 ontop of the base Stage 1 adds:
- In-tank Fuel Pump Upgrade
- Smaller supercharger pulley
Stage 2 - 10-11 psi - 390-420 wheel horsepower anticipated. Stage 2 ontop of the base Stage 1 adds:
- In-tank Fuel Pump Upgrade
- Larger Fuel Injectors
- LFX Models - High Pressure Fuel Pump Upgrade
- Smaller supercharger pulley
Stage 3 - 11-12psi - 410-450 wheel horsepower anticipated. Stage 3 ontop of the base Stage 1 adds:
- D-Series Procharger supercharger unit
- In-tank Fuel Pump Upgrade
- Larger Fuel Injectors
- LFX Models - High Pressure Fuel Pump Upgrade
*Special note* - The D-series upgrade is ONLY available at this price when purchasing the Stage 3 kit on the original upfront purchase. Upgrading your Procharger unit down the road is available but at a much higher pricepoint, so if you think you'll want this upgrade, now's the best time to consider it!


Want to see what the installation is like? Click here for PDF installation instructions
This kit can be bolted on by a good experienced amateur mechanic in a weekend. Anticipate a professional shop quoting around 10-12 hours for installation at their shop fee, based on experience and feedback from customers.


Randy's Stage 2 2010 Camaro going 0-100mph, also has headers and torque converter
Robert's Stage 2 2013 Camaro going 0-100mph, dynoed 402whp, has exhaust and 2.92 gears
Derek's 2015 Camaro doing a drive-by!

Question: What Power Gains Are Expected?
Question: When Should I Get Stage 3 With The Larger Procharger?
Question: Do I Need To Do Anything To The Car First Before Installing?
Question: How hard is it to install?
Question: How Reliable Is This Setup?
Question: Is there ANYTHING Special To Know About This Setup?
Answer: Due to the construction tolerances, Procharger recommends idling the engine and supercharger to warm it up in winter months and keep the rpms below 2500 until the engine is warm. Currently, the Procharger will require removing to change its oil until a drain system can be engineered; 6000 mile oil changes are suggested by Procharger.Question: I Already Have Overkill tuning, Can I buy without the HP Tuners?
Answer: If you have Overkill tuning through the HP Tuner system, you can select to purchase without the HP Tuner. If you have Overkill tuning through an Autocal, it's possible to tune through the Autocal for Stage 1 but requested that you switch to HP Tuners and to that end a rebate on sending back the Autocal will be offered, email to discuss before purchasing. 
Independent Belt System
One of the most important design elements is an independent supercharger belt system. Rather than using the factory OEM accessory belt, the Overkill system uses its own supercharger belt and leaves the factory belt completely intact. The new piggyback crank pulley indexes into the spokes of the OEM pulley so it is locked into place and cannot slip. It provides a wider 8-rib belt for the supercharger pulley to reduce the chance of belt slip. The supercharger, if ever needed, can also be easily disabled without having to affect the main accessory belt system.
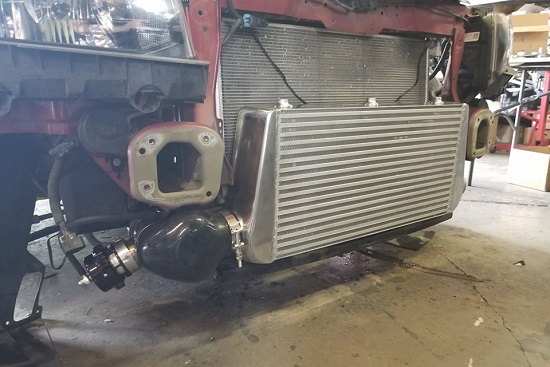
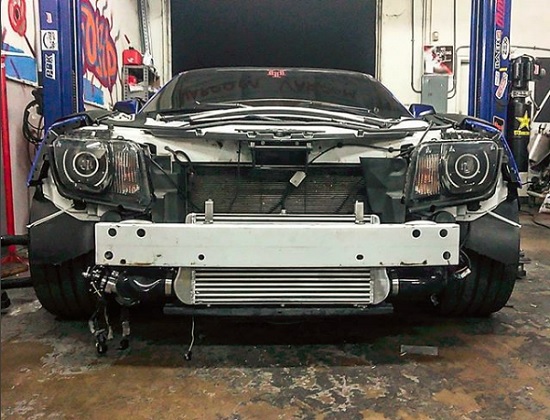
Large Front Mount Intercooler
One item that Overkill decided to include standard rather than have as an upgrade is the largest intercooler that could fit in front of the radiator. It is important to understand that all intercoolers are a flow restriction to some extent, and their size plays an important role in cooling and flow capabilities. This air to air intercooler uses a 24 inch long core (side to side) and 4 inch deep; this is longer and thicker than what used to be the standard for a Camaro supercharger kit. The longer the airflow stays in the heat exchanger, the better the cooling. The extra thickness provides more air passages which improves flow capability, which will make the supercharger boost more efficient at reaching the engine.
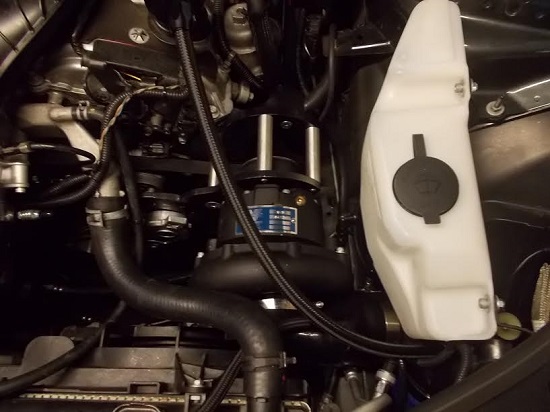
Catch Can System
Most other supercharger systems for other vehicles don't provide a catch can. It's an essential component to run a catch can on these styles of supercharger systems, to keep oil out of the supercharger system as well as the engine. On other systems, Will Overkill has literally witnessed engine oil being blow out of the blow off valve; this is oil that will be coating the internals of the supercharger, intercooler and its piping. The catch can system provided will catch the majority of this oil, keeping the intercooler clean inside and perform to its capability. In addition, the catch can system is set up to continuously evacuate the crankcase with vacuum, rather than operate on the presumption that there will be positive crankcase pressure when the intake manifold pressurizes with boost. Furthermore the system is a closed loop operation, there is no atmospheric venting within the system to relieve boost pressure, the system is designed to contain the PCV system to the engine and intake stream.
Purchasing Agreement
By purchasing and installing this supercharger kit, you the buyer understand and agree to the following:
- Buyer assumes all risks associated with adding an aftermarket performance part of this significance to your vehicle, including but not limited to the increased acceleration rates, potential for higher road speeds, the increased risk of mechanical wear and failure of existing components on your vehicle. No warranty for your vehicle is expressed or implied.
- The warranty on the Procharger head unit is limited to the terms of the manufacturer's warranty for 1 year from its construction (ordered at the time of your purchase). Warranty on other components of your Overkill supercharger kit is provided for 1 year from date of purchase against manufacture defects and is limited to defective component only.
- This kit has not gone through any official emissions certification including California CARB, and should be considered for offroad use only.
- The quoted estimated horsepower gains on this page are based on truthful and documented achievements from customer vehicles but no guaranteed level of performance gain is stated or implied for each individual case.
- Buyer understands the installation steps and requisite mechanical skill required to install the kit, and accepts inclusive on this that there can be instances where some fabrication or modification beyond the stated instructions is required.
- Buyer understands the tuning process required for this kit. A computer calibration change is required for this supercharger kit to be operational and the kit must be fully tuned to your specific vehicle to achieve its best results. The HP Tuner suite will allow you the buyer to interact with Overkill for both of these services, it's effectiveness is reliant in part on the buyer's active participation in the tuning process. For best results, Overkill requests you purchase an AEM 30-0334 wideband air/fuel meter or inquire about a loaner. Alternatively, you the buyer can choose to seek 3rd party tuning for this kit, and determine whether an HP Tuner suite is required or not during initial purchase. Whether purchased with or without an HP Tuner suite Overkill will provide an initial calibration change tune to your 3rd party tuner/installation shop upon request.
- If purchasing from the United States, this kit will cross the border from Canada and may be subject to fees assessed by the US government and/or UPS that you will need to pay to receive the packages. The most common fee we see is around $28. This is not a charge from Overkill.